Best Tub Transfer Benches: How to Cross a Tub rim Safely
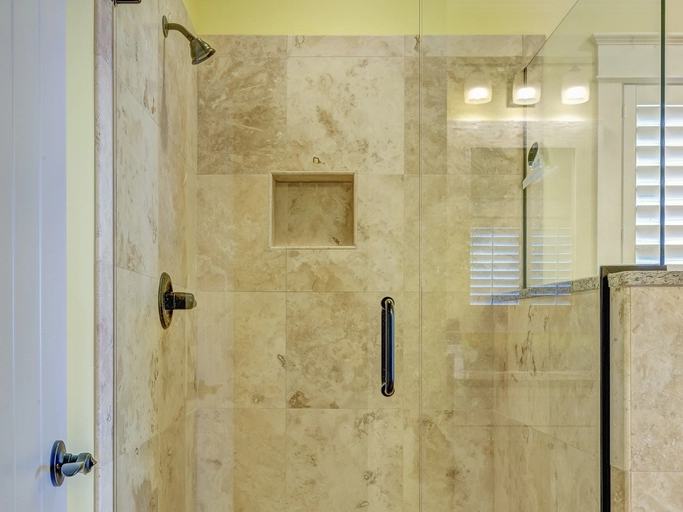
Think about what stepping into a bathtub actually involves. You lift one leg over a rim that comes up past your knee, balance on the other foot — which is usually already wet — and lower yourself onto a surface you cannot see, that is enamel, and that is also wet.
Nobody would design that movement on purpose. It is the second most common bathroom fall pattern, after standing up from the toilet, and a transfer bench removes it completely.
⚡ How a transfer bench works
Two legs stand outside the bathtub, two inside. You sit down on the dry outer half, then slide across and lift your legs over while seated — with your weight supported the whole time.
No standing on one leg. No stepping over anything. No unsupported moment at all.
We rank configurations and specifications, not model numbers — stock and product names change constantly, and a specific pick goes stale within months. Match the specification below at any retailer.
Bench, board or chair? 🛁
Three products get confused with each other, and they solve different problems.
| Product | Where it sits | Solves | Does not solve |
|---|---|---|---|
| Transfer bench | Straddles the rim — half in, half out | Crossing the rim entirely | Low bathing; splashing |
| Tub transfer board | Across the rim, inside the bathtub | Sitting to cross, at rim height | You still swing both legs over |
| Bath seat | Inside the bathtub, lower down | Sitting lower for a proper soak | Getting in and out |
| Shower chair | Inside a shower enclosure | Standing to wash | Crossing a tub rim |
| Swivel bath seat | Across the rim, rotates | Turning without twisting | Costs more; needs a wider bathtub |
The distinction that matters: a bench extends outside the bathtub, so you sit down on dry, stable ground before any part of you is over the rim. A board sits entirely on the rim, so you still have to get up onto it. If crossing the rim is the difficulty, that difference is the whole point.
Which one you need 🎯
| Your situation | Choose | Why |
|---|---|---|
| Cannot lift a leg over the rim | Transfer bench | Removes the step-over entirely |
| Balance goes when stepping | Transfer bench | You are seated for the whole movement |
| Can get in, cannot stand to wash | Tub transfer board or seat | The problem is bathing, not entering |
| Want to soak, not shower | Bath seat | Sits lower into the water |
| Turning causes pain or instability | Swivel seat | Rotates rather than making you twist |
| Walk-in shower, not a bathtub | Shower chair | Different problem entirely |
| Someone assists | Bench, backrest, no arm on the helper’s side | Room to work from beside |
The specification that matters 📋
- Individually adjustable legs. Non-negotiable — the floor outside and the bathtub floor inside are at completely different levels, and the four legs have to compensate.
- Non-slip feet on all four legs, with the inside pair suitable for enamel or acrylic.
- A backrest. You are turning and reaching while seated on a narrow surface; a back makes it far more stable and is worth the extra.
- A rim clamp or bracket that locates the bench against the bathtub so it cannot creep.
- A weight capacity well above body weight, because sitting down is a drop.
- A drainage seat, slotted so water does not pool.
- An aluminum frame. Painted steel rusts from inside the tubes.
- Tool-free assembly, so it can come apart for cleaning.
Tub Transfer Bench with Backrest
Sit down outside the bathtub, slide across, lift your legs over while seated.
The product that answers the second most common bathroom fall pattern. Two legs outside on the floor, two inside the bathtub, individually adjustable so the seat sits level despite the height difference. Look for a backrest, a rim bracket that stops it creeping, and an aluminum frame that will not rust from the inside.
- Legs
- Individually adjustable
- Back
- Yes — worth the extra
- Bracket
- Locates on the rim
- Frame
- Aluminum
- No standing on one wet leg — you are seated throughout
- Legs adjust separately for the floor and bathtub height difference
- Backrest steadies you while turning and reaching
- Measure across your tub rim before ordering — fit is everything
📏 Measure bathtub width, rim height and outside floor space first. As an Amazon Associate we may earn from qualifying purchases at no extra cost to you.
Measuring your bathtub 📐
More than any other product in this category, a transfer bench either fits or it does not. Five measurements, ten minutes.
- Bathtub width across the rim, outside edge to outside edge. The bench has to span this comfortably.
- Rim height from the bathroom floor to the top of the rim.
- Internal depth from the top of the rim to the bathtub floor — this is what the inside legs have to reach down.
- Floor space outside, at least the depth of the seat plus room to sit down.
- The rim itself — flat, rolled or tiled in? A rolled or tiled rim changes how a bracket sits.
- Any shower screen or door. A fixed screen along the rim is the most common thing that rules a bench out.
Benches need the rim clear along the section they straddle. A glass screen or a tub-shower door fixed along the rim leaves nowhere for the outside half to sit.
Check this first — it is the single most common reason a bench arrives and goes straight back. A shower curtain is fine; a fixed screen usually is not.
Using one properly 🚿
- Set the legs level before first use, and check by pressing down on each corner.
- Sit down on the outside half, on dry ground, with your back to the bathtub.
- Shuffle across toward the inside, staying seated.
- Lift one leg over the rim, then the other, while your weight is fully supported.
- Settle into the inside position before starting the water.
- Reverse the sequence to get out — legs over first, then shuffle out, then stand from the dry side.
The order is the point. At no stage are you standing on one leg, and at no stage are you unsupported. People who find a bench awkward are usually standing up too early — shuffle right out to the dry side before rising.
Two habits worth building in
First, put a grab bar on the wall beside the inside half. The bench takes your weight; the bar steadies the shuffle and the leg lift. Together they cover the whole movement, and a bench alone leaves your hands with nothing to do at the moment you are turning.
Second, run the water before you get on, not after. Setting the temperature while already seated over the bathtub means reaching for controls positioned for a standing person — which reintroduces exactly the stretching the bench was bought to avoid. Set it, test it, then transfer.
Neither is obvious, and both come up repeatedly when people describe a bench as “fine but awkward”. The product is rarely the problem by that point; the sequence around it usually is.
The splashing problem 💦
The genuine downside, and nobody mentions it before you buy. Half the bench sits outside the bathtub, so the curtain cannot simply hang down — and water follows the seat straight out onto the floor.
- Use a split or two-piece curtain — the inner part tucks into the bathtub, the outer part hangs outside the bench.
- Or cut a slit in an existing curtain so it can pass either side of the frame.
- Use a handheld shower head and keep it low. A fixed overhead head sprays exactly where the gap is.
- Put a towel or absorbent mat under the outside legs — and make sure it is non-slip.
- Aim away from the opening. Sounds obvious; it is the single most effective habit.
Worth planning for rather than discovering. A wet bathroom floor is a fall risk in its own right, which would rather undermine the point of the bench.
If a bench will not fit 🔄
A fixed shower screen, a bathtub boxed in on three sides, or simply no floor space outside — plenty of bathrooms rule a bench out. These are the alternatives, roughly in order of how much of the same problem they solve.
| Alternative | How much it helps | Needs |
|---|---|---|
| Swivel bath seat | Nearly as much — you turn rather than twist | A wide enough bathtub; costs more |
| Tub transfer board plus grab bar | Substantially — you sit to cross | Enough strength to get up onto it |
| Grab bar at the entry alone | Some — a hand where it is needed | Solid wall structure |
| Removing the screen for a curtain | Enables a bench after all | A small job; often overlooked |
| Bath lift | A great deal, for soaking | Charging; bulk; higher cost |
| Bathtub-to-shower conversion | Completely | Building work |
The fourth row is the one people skip past. Swapping a fixed shower screen for a curtain is a modest job — often an hour’s work — and it turns an impossible bathroom into one where a bench fits. Before accepting a lesser solution, check whether the obstacle can simply be removed.
It sits across the rim like a board but rotates, so you sit down facing outward, turn, and lift your legs over without twisting your spine or hips. It needs a reasonably wide bathtub and costs more than a board — but where a bench cannot fit, it preserves most of what makes one worth having.
Telling good from cheap 🔍
| Feature | Good sign | Warning sign |
|---|---|---|
| Leg adjustment | All four, independently | Paired, or fixed inside legs |
| Frame | Aluminum | Painted steel |
| Rim bracket | Adjustable clamp | None — the bench can creep |
| Seat | Wide, contoured, drainage slots | Narrow flat plastic |
| Backrest | Bolted through, rigid | Clips on; flexes when leaned on |
| Feet | Wide rubber, replaceable, suitable for enamel | Hard plastic; molded in |
| Capacity | Clearly stated, well above your weight | Vague or marginal |
Cleaning and maintenance 🧽
A transfer bench lives half in a wet environment and half on a bathroom floor, which is harder on it than it looks. Ten minutes a month keeps it trustworthy.
- Rinse and wipe after each use. Soap film on the feet reduces grip, which is precisely the property you are relying on.
- Check all four rubber tips monthly for hardening, splitting or trapped grit. The two inside the bathtub wear faster because they sit in water.
- Retighten every leg lock and the backrest fasteners monthly. Heat, steam and repeated loading loosen them faster than people expect.
- Re-test the level. Press down on each corner in turn — a bench that has drifted out of adjustment develops a rock.
- Check the rim bracket is still seated against the bathtub and has not been knocked out of position by cleaning.
- Look for corrosion at the joints, where water sits. On a painted frame this starts inside the tube and is invisible until it fails.
- Replace rather than repair. A cracked seat, a bent leg or a stripped adjustment hole means the bench has finished.
Common mistakes (with fixes) 🔍
A fixed glass screen along the rim leaves nowhere for the outside half of the bench to sit, and the whole thing is unusable.
The fix: check this before anything else. A curtain is fine; a fixed screen usually rules a bench out.
A board sits entirely on the rim, so you still have to get up onto it and swing both legs over. If crossing the rim is the difficulty, a board does not solve it.
The fix: a bench extends outside the bathtub, so you sit down on dry stable ground first.
The bathroom floor and the bathtub floor are at completely different levels. Four legs set identically produce a bench that tilts or rocks.
The fix: set the inside pair long and the outside pair short so the seat is level, then press each corner to test.
Rising while still over the bathtub reintroduces the exact unsupported moment the bench exists to remove.
The fix: legs over first, shuffle fully out to the dry side, then stand.
The curtain cannot hang past the frame, so water runs out onto the bathroom floor — creating a fall risk while removing another.
The fix: split curtain, handheld head kept low, non-slip absorbent mat outside.
You are turning and lifting legs while perched on a narrow seat. That is exactly when a back matters.
The fix: buy the version with a back. It is a small premium for the part that steadies the whole movement.
Pro tips 💡
- Check the shower screen before you check anything else. It decides whether a bench is possible at all.
- Ask about equipment loan services. Transfer benches are commonly lent free, especially after hip or knee surgery.
- Buy the split curtain at the same time. Discovering the splashing problem after the first use is avoidable.
- Add a grab bar on the wall beside the bench for the shuffle across. The bench holds you; the bar steadies you.
- Fit a handheld head on a slide rail — a fixed overhead head is aimed for a standing person and sprays straight out of the gap.
- Recheck the leg locks monthly. Thermal cycling and vibration loosen them faster than people expect.
- Set it up before surgery, not after. Coming home to a bathroom that already works is a very different experience.
What this looks like in real life 🏡
“It arrived and went straight back”
A well-chosen bench, correct width, good specification — and a fixed glass shower screen running the length of the rim. There was nowhere for the outside half to go. Thirty seconds of checking would have saved the whole exercise.
“The floor got soaked every time”
The bench worked perfectly and the bathroom floor ended up wet after every shower, because the curtain could not pass the frame. A split curtain and a handheld head kept low fixed it. Until then, a product bought to prevent falls had been creating a different one.
“He was standing up over the bathtub”
Using the bench to get in, then standing up while still over the tub to get out — which reintroduced exactly the moment the bench removes. Nobody had shown him the sequence. Legs over, shuffle out, then stand. The technique matters as much as the product.
Frequently asked questions ❓
What is a tub transfer bench?
A seat that straddles the tub rim — two legs outside on the bathroom floor, two inside the bathtub. You sit down on the dry outer half, shuffle across, and lift your legs over while seated. It removes the step over the rim on one wet foot, which is the second most common bathroom fall pattern.
Bench or tub transfer board?
A bench extends outside the bathtub, so you sit down on stable dry ground before any part of you crosses the rim. A board sits entirely on the rim, so you still have to get up onto it. If crossing the rim is the difficulty, buy the bench — that difference is the whole point.
Will a transfer bench fit my bathtub?
Measure the width across the rim, the rim height from the floor, the internal depth, and the floor space outside. Then check for a fixed shower screen along the rim — that is the most common reason a bench does not work, because the outside half has nowhere to sit. A shower curtain is fine.
How do I stop water going everywhere?
Use a split or two-piece shower curtain so the inner part tucks into the bathtub and the outer part hangs outside the frame, or cut a slit in an existing curtain. Use a handheld shower head kept low rather than a fixed overhead one, and put a non-slip absorbent mat under the outside legs.
Do I need the version with a backrest?
Yes, for most people. You are turning, reaching and lifting your legs while seated on a fairly narrow surface, and the backrest is what steadies all of that. It is a small premium for the feature that makes the movement feel secure rather than precarious.
Can I get one on loan?
Frequently, yes — transfer benches are among the most commonly lent items through health services, social care and disability charities, especially after hip or knee surgery. Ask before buying, and if a need is coming up, set it up before the operation rather than after.
Buying checklist ✅
Before you order
- Shower screen checked — a fixed screen usually rules a bench out
- Bathtub width across the rim measured
- Rim height from the floor measured
- Internal depth to the bathtub floor measured
- Floor space outside the bathtub confirmed
- Rim type noted — flat, rolled or tiled
- All four legs individually adjustable
- Backrest included
- Rim bracket or clamp included
- Frame confirmed as aluminum
- Weight capacity well above body weight
- Split shower curtain ordered at the same time
- Handheld shower head on a slide rail planned
- Grab bar on the wall beside the bench considered
- Equipment loan services asked about first
The bottom line
A transfer bench answers a specific and genuinely dangerous movement: lifting a leg over a high rim while balanced on one wet foot. It replaces that with sitting down on dry ground and sliding across, and nothing about the sequence is unsupported.
Check for a fixed shower screen before anything else, measure all four dimensions, insist on individually adjustable legs and a backrest, and buy a split curtain at the same time. Then learn the sequence — legs over, shuffle fully out, then stand — because standing up too early reintroduces the exact risk the bench removed.
Keep reading: Best Shower Chairs for Seniors · Bathroom Safety Checklist for Seniors · How to Make a Bathroom Accessible Without Renovating · Accessible Bathrooms: The Complete Guide · Bathroom Safety After Hip Replacement · Walk-In Shower for the Elderly · Does Medicare Cover Shower Chairs? · Shower Chair vs Transfer Bench vs Tub Bench · Shower Seat and Bench Height · ADA Compliant Walk-In Tubs · How to Use a Shower Chair Safely
We rank configurations rather than specific models, because stock and product lines change constantly. Confirm the current specification and weight rating against the actual product before ordering.