Best Non-Slip Bathroom Flooring and Mats: What Actually Grips
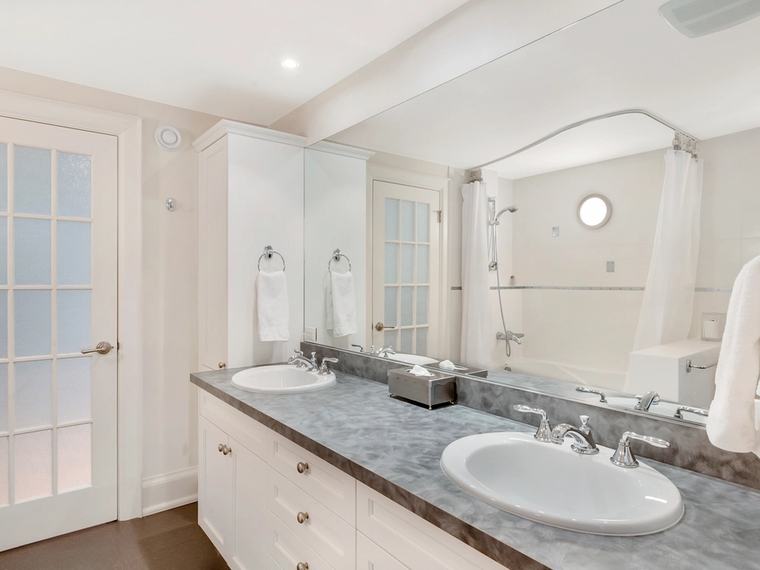
Bathroom flooring is sold on how it looks and rated for how it grips dry. Both of which are the wrong test, because the bathroom is the one room where the floor is regularly wet and the feet are regularly bare.
This guide is about what actually grips under those conditions — and about the more common problem, which is that the mat someone bought for safety is the most dangerous thing in the room.
⚡ The short answer
Texture beats coating. A surface that grips because of its shape keeps gripping; one that grips because of a treatment wears off.
A mat that moves is worse than bare floor. If it does not stay put, remove it today.
Most falls come from having nothing to hold, not from a slippery floor. Flooring matters — support matters more.
Why slip ratings mislead 📉
Flooring carries slip-resistance ratings, and they are genuinely useful — as long as you know what they were measured under.
- Many published figures are dry ratings. A tile can be excellent dry and poor wet, and the difference is dramatic on polished surfaces.
- Some wet ratings assume footwear. Bathrooms are a barefoot environment, which behaves differently.
- Soap and shampoo residue change everything. A floor tested with clean water is not being tested under bathroom conditions.
- Ratings describe new material. Polished surfaces get more slippery as they wear; textured ones hold up better.
- Test panels are flat. Real floors have falls, grout lines and thresholds.
“What is the wet, barefoot rating?” Retailers who know their product will answer immediately. If the answer is a dry figure or a shrug, treat the surface as unknown — and where you can, wet a sample and stand on it yourself.
Flooring compared 🔲
| Surface | Wet barefoot grip | Notes |
|---|---|---|
| Safety vinyl (slip-resistant sheet) | Excellent | Aggregate through the material; warm underfoot; welded seams |
| Textured porcelain | Very good | Grip comes from the surface profile, so it does not wear off |
| Small mosaic tile | Good | Grout lines add grip — the reason it suits shower floors |
| Matt ceramic | Moderate | Better than gloss; still check the wet rating |
| Standard vinyl / lino | Moderate | Fine dry, variable wet |
| Polished porcelain | Poor | Looks superb, behaves badly wet |
| Natural stone, polished | Poor | Honed is better; polished is not a bathroom floor |
| Laminate | Poor | Also damaged by standing water |
The pattern is consistent: surfaces that grip because of their physical texture outperform surfaces that grip because of a finish. Texture survives cleaning, wear and years of use; a treated finish does not.
Safety vinyl deserves a mention beyond its rating. It is warm underfoot, which matters for bare feet; it can be coved up the wall to make a genuinely waterproof floor; and it is far more forgiving to land on than porcelain. It photographs less well than tile, which is most of why people avoid it.
The mat problem 🪤
Here is the uncomfortable part. A great many bathroom mats bought explicitly for safety are the single most dangerous item in the room.
- A mat that slides moves under a foot at the exact moment weight transfers onto it.
- A curled or rucked edge is a trip hazard at ankle height, on a hard floor.
- A thick pile mat changes the floor height by an inch, which catches toes and walkers.
- A wet fabric mat is slippery on top as well as underneath.
- They give false confidence. People step onto a mat expecting grip, which is worse than knowing the floor is slippery.
Put a foot on each bathroom mat and push it sideways, hard. If it moves, it is a hazard, not a safety measure. Either replace it with one that has a genuine rubber backing, fix it down with mat tape, or take it out.
Bare floor is safer than a moving mat. Always.
What a good mat looks like
- A full rubber or latex backing, not a few printed dots.
- Low profile, so it does not create a lip.
- Edges that lie flat and stay flat after washing.
- Quick-drying material, because a permanently damp mat grips less and harbours mould.
- Machine washable, since backing degrades faster when mats are washed harshly.
- Replaced when the backing hardens. Rubber perishes; mats have a lifespan.
Inside the bathtub or tray 🛁
The slipperiest surface in the house, and a different problem from the floor outside.
- Enamel and acrylic are very slick wet, and soap makes it considerably worse.
- A suction bath mat works well if the surface is smooth and clean — the same physics that makes suction grab bars unreliable applies here, but the consequences are much lower because you are not trusting it with your body weight.
- Adhesive anti-slip strips or treads are more reliable than suction, since they do not depend on a vacuum.
- Clean underneath a suction mat weekly. Soap film under the cups destroys the seal, and mould grows there.
- Check the suction before each use by pressing down and trying to slide it.
- Textured shower trays are worth specifying when replacing one — grip built into the surface rather than added on top.
Non-Slip Bathtub and Shower Mat
Full-coverage suction for enamel and acrylic — the surface that needs it most.
Inside the bathtub or tray is where a mat genuinely earns its place. Look for full-coverage suction cups rather than a sparse pattern, drainage holes so water does not sit underneath, and a size that covers the whole standing area rather than a small pad in the middle.
- Suction
- Full coverage
- Drainage
- Holes throughout
- Size
- Covers the standing area
- Care
- Lift and clean weekly
- Grips the one surface that is slick even when new
- Drainage holes stop water and soap pooling beneath
- Lift it weekly — soap film under the cups breaks the seal
- Adhesive strips are more reliable if the surface is textured
⚠️ Suction needs a smooth clean surface — on textured trays use adhesive strips instead. As an Amazon Associate we may earn from qualifying purchases at no extra cost to you.
Anti-slip treatments and strips 🧪
Where replacing the floor is not realistic, these improve an existing surface.
- Adhesive anti-slip strips — cheap, effective, and best placed where feet actually land rather than in a decorative pattern.
- Anti-slip floor treatments etch the surface microscopically to add grip. They work, they are invisible, and they need reapplying periodically.
- Anti-slip coatings add a textured layer on top. More visible, more durable, and they change the look.
- Sealing grout stops it absorbing soap and becoming slick.
- None of these are permanent. Schedule reapplication, because a treatment everyone believes is still working is a hazard of its own.
Strips are the pragmatic choice for most households: very cheap, no specialist application, and immediately effective. Put them where the feet go — stepping out of the shower, in front of the toilet, at the doorway.
Habits that matter more than surfaces 🧹
- Rinse soap residue off the floor. Soap film is a bigger factor than most people realise, and it builds up invisibly.
- Do not use polish or wax on a bathroom floor, ever. Some general-purpose cleaners leave a film too.
- Deal with drips immediately — a small puddle by the sink is a common fall spot.
- Run the extractor. Condensation on a cold tile floor is genuinely slippery and completely invisible.
- Aim the shower away from the opening, and use a curtain that actually contains the water.
- Dry feet before stepping out, and keep a towel within reach of the shower.
The cleaning-product point is worth repeating. A good floor can be made dangerous by the wrong cleaner, and it is a change that happens gradually enough that nobody connects it to a fall.
Testing the floor you already have 🧪
Before deciding whether your floor is a problem, find out. Ten minutes, no equipment, and it will tell you more than any published rating.
- Clean the floor properly first with a plain cleaner and rinse it, so you are testing the surface rather than a build-up of residue.
- Wet a section the way it gets wet in use — a splash from the shower, not a puddle.
- Stand on it barefoot, holding something solid, and try to slide your foot forward and sideways.
- Repeat with a trace of soap in the water. This is the honest test, and it is the one that surprises people.
- Test the specific spots that matter — stepping out of the shower, in front of the toilet, at the doorway. They behave differently.
- Test inside the bathtub or tray separately, holding on properly. It will be worse than the floor.
- Test again after your usual cleaning routine, to see whether the product is leaving a film.
You are deliberately testing whether a surface will let your foot slide. Do it holding a solid fixture, with another person present, and do not test it on behalf of someone who is already unsteady — their floor, your feet.
The soap step is the one that changes minds. A floor that feels secure under clean water frequently behaves very differently with a trace of shampoo on it — which is the actual condition it is used in, several times a week.
Where flooring sits in the priority list 📊
Honest context, because flooring gets more attention than its share of the risk.
| Priority | Action | Cost |
|---|---|---|
| 1 | Remove or fix down any mat that moves | Free |
| 2 | Clear the floor of bins, baskets, scales | Free |
| 3 | Stop using polish or film-leaving cleaners | Free |
| 4 | Motion lighting on the night route | $ |
| 5 | Support at the toilet and the bathtub entry | $–$$ |
| 6 | Anti-slip strips where feet land | $ |
| 7 | Non-slip mat inside the bathtub or tray | $ |
| 8 | Anti-slip floor treatment | $$ |
| 9 | Replace the flooring | $$$ |
Replacing the floor is last for a reason. “There was nothing to hold onto” describes more bathroom falls than “the floor was wet” — so a grab bar usually buys more safety per dollar than a new floor. Replace the flooring when you are renovating anyway; do the top three rows today.
Thresholds, edges and level changes 📏
Slip is only half of it. The other half is trip — and in a bathroom the trip hazards are mostly at the edges, where one surface meets another.
- The doorway threshold. A raised strip between hallway carpet and bathroom tile catches toes and castors alike. Aim for flush, or bevelled if a change is unavoidable.
- The shower tray lip. Even a low tray creates a step at exactly the point where someone is wet, turning and possibly holding something. A grab bar at that point is worth more than any flooring change.
- The tub rim. The highest and most awkward edge in the room — this is a transfer bench problem rather than a flooring one.
- Changes in floor material. Each junction is a potential lip and a visual break that can be misread as a step.
- Contrast tape on edges you cannot remove. Cheap, immediate, and it makes a level change visible rather than something to discover with a foot.
Where a floor is being replaced anyway, run one continuous material with no thresholds. It removes every junction at once, looks better, and is the reason safety vinyl coved up the wall is so common in bathrooms designed for accessibility.
Common mistakes (with fixes) 🔍
Bought for safety, it moves under a foot at the moment weight transfers onto it — and it is trusted, which makes it worse.
The fix: push-test every mat today. Full rubber backing, mat tape, or remove it.
Polished porcelain can be excellent dry and genuinely dangerous wet and barefoot.
The fix: ask for the wet barefoot rating, and wet a sample and stand on it if you can.
Polish and film-leaving cleaners turn a safe floor into a slippery one, gradually enough that nobody connects it to a fall.
The fix: plain cleaner, rinsed. No polish, no wax, nothing that leaves a shine.
Soap film under the cups breaks the seal, and the mat looks exactly the same as it did when it worked.
The fix: lift and clean it weekly, and press-test it before each use.
A new floor is expensive and disruptive, and most bathroom falls come from having nothing to hold rather than from the surface.
The fix: grab bars first. Replace the flooring when you are renovating anyway.
An anti-slip treatment applied years ago is invisible, so everyone assumes it is still working.
The fix: schedule reapplication at the manufacturer’s interval, and test the floor wet occasionally.
Pro tips 💡
- Push-test every mat in the house today. It takes two minutes and it is the highest-value thing in this article.
- Wet a flooring sample and stand on it barefoot before buying. Showrooms rarely offer; ask anyway.
- Put anti-slip strips where feet land, not in a decorative pattern — stepping out of the shower, in front of the toilet.
- Consider safety vinyl seriously. It is warmer, more forgiving to land on and grippier than tile; it just photographs worse.
- Small tiles for shower floors. More grout lines means more grip, which is why mosaic is used there.
- Check the floor after cleaning, not before. That is when residue is at its worst.
- Run the extractor properly. Condensation on cold tile is invisible and genuinely slippery.
What this looks like in real life 🏡
“The safety mat caused the fall”
A mat bought specifically to make the bathroom safer, with a printed dot pattern on the back rather than a rubber backing. It slid on the tile as she stepped onto it. Removing it entirely left a floor that was less comfortable and considerably safer. Push-testing it would have taken two seconds.
“It was the cleaner”
A textured porcelain floor chosen carefully for its wet rating, which became noticeably slippery over about a year. The cleaning product being used left a fine film that filled the texture. Switching products and scrubbing the floor once restored it. Good flooring can be undone by what you clean it with.
“We replaced the floor and he still fell”
A full re-floor in safety vinyl after a fall, done properly and at real expense. He fell again three months later, getting up from the toilet, because there was still nothing to hold onto. A grab bar, fitted afterwards, cost a fraction of the floor. Surfaces matter; support matters more.
Frequently asked questions ❓
What is the best non-slip bathroom flooring?
Safety vinyl with aggregate through the material, or textured porcelain. Both grip because of their physical texture rather than a surface treatment, so the grip does not wear off. Safety vinyl is also warmer underfoot and more forgiving to land on, which matters in a barefoot room.
Are bath mats safe?
Only if they genuinely stay put. A mat that slides moves under a foot exactly as weight transfers onto it, and because it was bought for safety it gets trusted. Push-test every mat: if it moves, fit a proper rubber-backed one, tape it down, or remove it. Bare floor beats a moving mat every time.
Do anti-slip treatments work?
Yes, and they are not permanent. Etching treatments add microscopic grip invisibly and need reapplying periodically; coatings add a textured layer that lasts longer but changes the look. Adhesive strips are the cheapest and most practical option for most households — put them where feet actually land.
Should I replace my bathroom floor?
Only if you are renovating anyway, or the existing floor is genuinely dangerous wet. Most bathroom falls come from having nothing to hold onto rather than from the surface, so a grab bar usually buys more safety per dollar than a new floor. Do the free changes and add support first.
What about inside the bathtub?
Enamel and acrylic are the slipperiest surfaces in the house, and this is where a mat genuinely earns its place. Use a full-coverage suction mat with drainage holes, and lift and clean it weekly — soap film under the cups breaks the seal without changing how the mat looks. On textured trays, use adhesive strips instead.
Can cleaning products make a floor slippery?
Yes, and it is a common overlooked cause. Polish and wax are the obvious culprits, but many general-purpose cleaners leave a fine film that fills the texture of a slip-resistant floor. Use a plain cleaner, rinse properly, and check the floor after cleaning rather than before.
Flooring checklist ✅
Start with the free rows
- Every mat push-tested; anything that moves fixed or removed
- Mat backings checked — full rubber, not printed dots
- Floor cleared of bins, baskets and scales
- Polish and film-leaving cleaners stopped
- Floor scrubbed once to remove existing residue
- Extractor working, to prevent condensation on cold tile
- Anti-slip strips placed where feet actually land
- Non-slip mat inside the bathtub or tray
- Suction mat lifted and cleaned weekly
- Grab bars fitted at the toilet and the bathtub entry
- Wet barefoot rating checked on any new flooring
- Sample wetted and stood on before buying
- Grout sealed
- Treatment reapplication scheduled
The bottom line
Choose flooring on its wet barefoot performance, not its dry rating or its appearance, and prefer surfaces that grip because of texture rather than treatment — texture survives, treatments wear off.
Then do the two-minute job that matters most: push-test every mat in the house. A mat bought for safety that slides is more dangerous than no mat at all, because it is trusted. And keep flooring in proportion — most bathroom falls come from having nothing to hold onto, so if you are choosing between a new floor and a grab bar, fit the bar.
Keep reading: Bathroom Safety Checklist for Seniors · Bathroom Lighting and Night Safety · Accessible Bathrooms: The Complete Guide · Where Should Grab Bars Be Installed? · Walk-In Shower for the Elderly
General information, not medical advice. Slip-resistance standards and ratings vary by country — ask specifically for the wet barefoot figure and confirm it applies to your intended use.