ADA Bathroom Layouts: The Configurations That Actually Work
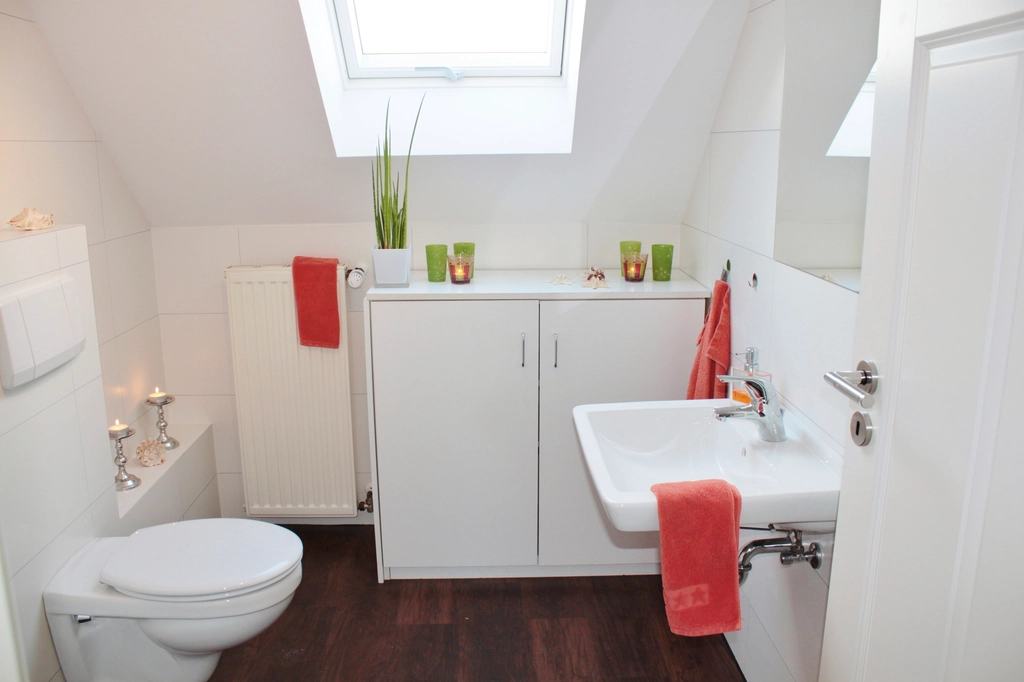
Two bathrooms with identical floor area can differ completely in whether they comply. Accessibility is decided by arrangement, not by square footage — where the toilet sits, which way the door swings, and whether the required clear rectangles overlap in the right places.
This covers the layouts that work, in plan, and the planning errors that force a room to be redrawn after the walls are up.
⚡ The planning rules
Overlap is allowed and necessary. The turning circle may overlap fixture clear spaces — that is how compact rooms comply.
Toilet in a corner, sink on the opposite wall. The configuration that works most often.
Door outward or sliding. An inward swing eats the space you need.
Draw the rectangles, not the room. If they fit, it works.
Design with rectangles, not rooms 📐
The productive way to plan an accessible bathroom is to stop thinking about the room and start placing the required shapes. If they all fit without conflicting, the room works. If they do not, no amount of extra floor area will save it.
| Shape | Size | Belongs to |
|---|---|---|
| Turning circle | 60 in diameter | The room |
| Turning T-shape | 60 × 60 in, arms 36 in | The room (alternative) |
| Toilet clear space | 60 in from side wall × 56 or 59 in deep | The toilet |
| Sink clear space | 30 × 48 in, forward approach | The sink |
| Shower clear space | 36 × 48 in or 30 × 60 in | The shower |
| Door maneuvering clearance | Varies by approach | The door |
Draw those shapes to scale, cut them out, and move them around a plan of the room. Ten minutes of that answers questions that a week of arguing about square footage will not.
What may overlap what 🔀
This is the single most useful piece of layout knowledge, and it is what makes compact compliant rooms possible at all.
| Pair | May overlap? |
|---|---|
| Turning space & toilet clear space | Yes |
| Turning space & sink clear space | Yes |
| Turning space & knee clearance under a sink | Yes |
| Sink clear space & shower clear space | Generally yes |
| Toilet clear space & the sink itself | No |
| Any clear space & a door swing | No |
| Any clear space & a fixed obstruction | No |
Read rows one to three together and the design strategy falls out: put the turning circle in the middle and let it absorb the fixture clear spaces around it. The room then needs to be only slightly larger than the circle plus the fixture depths, rather than the sum of every requirement laid out separately.
Five layouts that work 🗺️
| Layout | Arrangement | Works when | Watch for |
|---|---|---|---|
| Corner | Toilet in a corner, sink on the opposite wall, door on the third | Most single-user rooms | Sink creeping into the toilet clear space |
| In-line | Toilet, sink and shower along one long wall | Narrow rooms | Needs real width opposite for turning |
| Opposite | Toilet one wall, sink facing it | Square rooms | Turning circle must clear both |
| Wet room | Shower area open, no enclosure | Roll-in required; generous footprint | Drainage and containment |
| Split / two-door | Toilet compartment separate from the sink area | Larger facilities | Each zone needs its own compliance |
The corner layout is the workhorse and it is worth understanding why: putting the toilet in a corner gives you two walls for grab bars at no cost, and it pushes the 60-inch clear space out into the middle of the room where the turning circle already is. The two requirements share the same floor.
The corner layout, in detail 📍
- Place the toilet first, in a corner, with its centerline 16 to 18 inches from the side wall. Everything else adapts around it; the toilet cannot.
- Confirm the side wall is long enough for a 42-inch grab bar starting no more than 12 inches from the rear wall and reaching 54 inches from it.
- Draw the 60-inch clear space out from that side wall, and the 56 or 59 inches from the rear wall.
- Drop the 60-inch turning circle in, overlapping the toilet clear space as much as it will.
- Put the sink on a wall the circle already reaches, with its 30 × 48 clear space overlapping the circle — and entirely outside the toilet’s 60-inch width.
- Place the door last, on whichever wall is left, opening outward or sliding.
- Check the shower, if there is one, gets its clear space without pushing the circle out of position.
Most failed layouts are drawn in the opposite order — door placed where the corridor suggests, fixtures fitted around it. The toilet has the most constraints and the least flexibility, so it should be placed first and the door should absorb whatever is left over.
The door decision 🚪
| Door type | Space cost inside | Notes |
|---|---|---|
| Inward swing | High | Cannot encroach on any clear space; often impossible |
| Outward swing | None inside | Needs clearance in the corridor; safest if someone falls behind it |
| Sliding / pocket | None | Excellent for space; hardware must be closed-fist operable |
| Bi-fold | Low | Hardware and clear width need care |
| No door / screen wall | None | Common in larger facilities; privacy by layout |
There is a safety argument as well as a spatial one. An inward-opening door can be blocked by someone who has fallen behind it, which turns a fall into an emergency nobody can reach. Outward or sliding removes that risk entirely, and it is one of the few decisions that improves both compliance and real-world safety at once.
Whatever you choose, the requirement is 32 inches of clear width measured with the door open at 90 degrees — which normally means a 36-inch door leaf, and for a sliding door means checking the clear opening rather than the panel size.
42-Inch Side Wall Grab Bar
The bar whose required length dictates how long the toilet side wall must be.
The side wall grab bar is a layout constraint disguised as an accessory. It has to be at least 42 inches long, start no more than 12 inches from the rear wall, and reach at least 54 inches from it — which sets a minimum usable length for the wall the toilet sits against. Draw it in plan before finalizing the layout, and buy to the 250 lbf, 1.25 to 2 inch diameter, 1.5 inch clearance specification.
- Length
- 42 in minimum
- Start
- Max 12 in from rear wall
- Reach
- Min 54 in from rear wall
- Height
- 33–36 in to the top
- Its length sets the wall length — check this before framing
- Draw it in plan, not just elevation, to catch door and corner conflicts
- Blocking behind the whole wall costs little while it is open
- 250 lbf in any direction, 1.5 in clear of the wall
🔩 If the wall is too short for a 42 in bar, the layout is wrong — not the bar. As an Amazon Associate we may earn from qualifying purchases at no extra cost to you.
Realistic room sizes 📏
The standards specify clearances, not room dimensions. But planning needs a starting number, so these are the footprints that tend to work in practice.
| Room | Typical workable size | Comfortable |
|---|---|---|
| Single-user, toilet + sink | 60 × 90 in | 66 × 96 in |
| Toilet + sink + transfer shower | 72 × 96 in | 84 × 108 in |
| Toilet + sink + roll-in shower | 84 × 108 in | 96 × 120 in |
| Wet room, full roll-in | 96 × 108 in | 108 × 132 in |
| Wheelchair compartment in a stall range | 60 in wide × 59 in deep | 60 × 66 in |
| Ambulatory compartment | 36 × 60 in | — |
Treat these as sanity checks rather than targets. A well-arranged 60 × 90 room complies where a badly arranged 84 × 84 room does not, which is exactly the point — the shapes have to fit, and area alone does not guarantee that.
Making a tight room work 🔧
- Use the T-shaped turning space instead of the circle. It fits into rectangular rooms that a 60-inch circle will not, and it is equally compliant.
- Wall-hung toilet. Reduces the required clear depth from 59 inches to 56 — three inches that frequently decide the layout.
- Wall-hung sink with knee clearance, so the turning space can extend under it.
- Sliding or outward-opening door, which removes the swing from the equation entirely.
- Transfer shower rather than roll-in, where the user can transfer — 36 × 36 fits where 30 × 60 will not.
- Borrow space from an adjacent room. Moving one wall 12 inches is often cheaper than every other workaround combined.
- Recess the toilet paper dispenser and other fittings so nothing projects into a clear space.
Designers reach for the 60-inch circle by habit, then conclude a rectangular room cannot comply. The T-shaped turning space — 60 × 60 inches overall with 36-inch arms — is an equal alternative and fits many rooms the circle cannot.
Adapting these at home 🏠
None of this binds a private home, and applying it wholesale to a small domestic bathroom usually makes the room worse. But the layout logic is still useful — selectively.
| Principle | Worth applying at home? |
|---|---|
| Toilet in a corner, two walls for bars | Yes — free, and it makes bars easy |
| Door opens outward or slides | Yes — safety, not just space |
| Blocking in every wall | Yes — costs almost nothing during work |
| Level shower threshold | Yes, if the structure allows |
| Clear space beside the toilet | Yes, scaled to who actually uses it |
| Full 60 in turning circle | Only if a wheelchair is involved |
| Sink knee clearance | Only if someone sits at it |
| Exact 16–18 in centerline | Only if lateral transfers happen |
The top three rows are worth doing in any bathroom being rebuilt, for any household. They cost nothing extra at design stage and they leave the room able to adapt later — which is the whole argument for thinking about layout before anyone needs it.
Common mistakes (with fixes) 🔍
The door goes where the corridor suggests, and the fixtures get arranged around it — which is backwards, because the toilet has far more constraints than the door does.
The fix: place the toilet first, then the turning space, then the sink, and let the door take whatever wall is left.
Floor area is not the requirement. A generous room with the sink beside the toilet fails where a small well-arranged one passes.
The fix: draw the clear rectangles on the plan. If they fit without conflicting, it works.
Designers reserve separate floor for the turning space and every fixture clearance, conclude the room is too small, and specify a bigger one than needed.
The fix: overlap the turning space with fixture clear spaces and knee clearances — that is what the standard intends.
The toilet is positioned correctly but the wall it sits against cannot host a bar with the required start point and reach.
The fix: draw the grab bars in plan at design stage, not on the elevation at fit-out.
A 60-inch circle will not fit a narrow rectangular room, and the project concludes compliance is impossible.
The fix: use the 60 × 60 T-shaped turning space with 36-inch arms. It is an equal alternative.
A layout built around someone who walks unaided, when a walker or chair is likely within a few years.
The fix: get the door width, the threshold and the blocking right now — those three are cheap in advance and expensive later.
Pro tips 💡
- Cut the shapes out of card at scale and move them on the plan. It is faster than drawing and it makes conflicts obvious.
- Tape the layout full-size on the floor before framing, and walk it with the actual wheelchair or walker.
- Place the toilet first, every time. It is the least flexible element in the room.
- Choose a wall-hung toilet in tight rooms for the three inches of depth.
- Draw the door swing over the clear rectangles, in color, so an encroachment cannot be missed.
- Put blocking in every wall while they are open, not only where bars are planned.
- Sanity-check against 60 × 90 inches for a single-user room — if you are well under that, expect to move a wall.
What this looks like in real life 🏡
“The bigger room was the one that failed”
Two restrooms in the same building. The larger one put the sink on the open side of the toilet, so the 60-inch clear rectangle could not be drawn. The smaller one had the toilet in a corner and the sink opposite. The small one complied and the large one did not — on an identical fixture list.
“We thought the room was too narrow”
A long narrow room where a 60-inch circle would not fit, and the project was about to move a structural wall at significant cost. The T-shaped turning space fitted with room to spare. Nobody on the team had used it before.
“The door was drawn last and swung inward”
Every fixture correct, every clearance correct, and an inward-opening door whose swing crossed the toilet clear space. It was picked up at inspection. Rehanging it to open outward took an afternoon — but only because there happened to be corridor space for it, which there very often is not.
Frequently asked questions ❓
What is the best layout for an accessible bathroom?
The corner layout works most often: toilet in a corner, sink on the opposite wall, door on the third wall opening outward or sliding. Putting the toilet in a corner gives you two walls for grab bars at no cost and pushes its 60-inch clear space into the middle of the room, where it can overlap the turning space. That overlap is what makes compact rooms comply.
Can the turning space overlap the toilet clear floor space?
Yes, and it is meant to. The 60-inch turning circle may overlap fixture clear floor spaces and knee clearances under fixtures. Reserving separate floor for the turning space and every clearance is the most common reason designers conclude a room is too small — overlapping them is both permitted and the intended approach.
How big does an ADA bathroom need to be?
The standards specify clearances rather than a room size, so arrangement matters more than area. In practice a single-user restroom with a toilet and sink usually works at around 60 by 90 inches, adding a transfer shower pushes it to roughly 72 by 96, and a roll-in shower to about 84 by 108. A well-arranged small room complies where a badly arranged larger one does not.
Should an accessible bathroom door open in or out?
Outward, or sliding. An inward swing may not encroach on any required clear floor space, which in most compliant layouts leaves nowhere for it to go. There is also a safety argument: an inward-opening door can be blocked by someone who has fallen behind it, making them impossible to reach. Whichever you choose, you need 32 inches of clear width with the door open at 90 degrees.
What is a T-shaped turning space?
An alternative to the 60-inch turning circle: a T-shaped area 60 by 60 inches overall with arms at least 36 inches wide, allowing a wheelchair to turn by backing into one arm. It is equally compliant and fits many narrow rectangular rooms that a circle cannot. It is widely under-used, and reaching for it before moving a wall can save a great deal of money.
Should I use these layouts in my own home?
Selectively. Three principles are worth applying in any bathroom being rebuilt, for any household: put the toilet in a corner so two walls are available for grab bars, make the door open outward or slide, and put blocking in every wall while they are open. All three cost almost nothing at design stage. The full space requirements — the 60-inch turning circle in particular — are only worth applying if a wheelchair is genuinely involved, since they consume storage you may need more.
Layout checklist ✅
Before the walls go up
- Clear rectangles drawn to scale on the plan
- Toilet placed first, centerline 16–18 in from the side wall
- Side wall long enough for a 42 in grab bar with correct reach
- Rear wall long enough for a 36 in bar
- Grab bars drawn in plan, not only elevation
- Turning space placed and overlapped with fixture clearances
- T-shaped turning space considered for narrow rooms
- Sink entirely outside the toilet’s 60 in clear width
- Sink knee clearance provided if someone will sit at it
- Door placed last, opening outward or sliding
- Door swing drawn over the clear rectangles
- 32 in clear width confirmed with the door at 90°
- Wall-hung fixtures considered in tight rooms
- Shower type chosen and its clear space allocated
- Layout taped full-size on the floor and walked
- Blocking planned in every wall
- Five-year needs considered, not just today’s
The bottom line
Accessible bathrooms are won and lost on arrangement. Draw the required rectangles, place the toilet first because it is the least flexible thing in the room, overlap the turning space with everything it is allowed to overlap, and give the door whatever wall is left — opening outward.
Two moves rescue most rooms that look impossible: the T-shaped turning space instead of the circle, and a wall-hung toilet for three inches of depth. Between them they solve more layout problems than moving a wall, and they cost a fraction as much.
Keep reading: ADA Bathroom Requirements Checklist · ADA Toilet Requirements · ADA Shower Requirements · Wheelchair Accessible Bathroom Dimensions · Small Accessible Bathroom Ideas · Toilet Transfer Space
Figures are from the 2010 ADA Standards for Accessible Design and are given for general reference, not as legal or code advice. State and local codes may be stricter. Confirm against the published standards and your local authority before building.