Wheelchair Accessible Bathroom Dimensions: Sizing the Whole Room
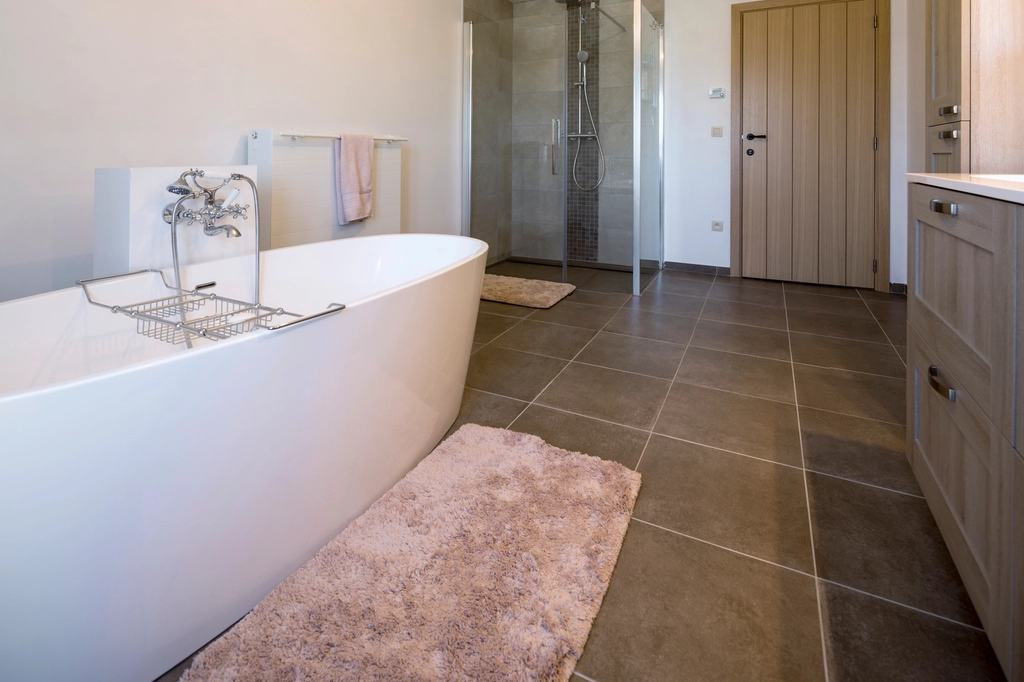
An accessible toilet in an inaccessible room is not much use. Getting the toilet right is only one part of the job — the doorway has to admit the chair, the sink has to be usable from seated, and there has to be somewhere to go once you are inside.
This guide sizes the whole room. Every fixture, every clearance, and — more usefully — what to do when your bathroom is smaller than the published numbers, which it almost certainly is.
⚡ The short answer
A fully accessible bathroom built to standard needs roughly 60 × 60 inches of clear turning space, a 32-inch clear doorway, and enough circulation to reach every fixture from a seated position.
Most existing bathrooms are smaller. That is workable far more often than people assume — the order in which you give things up is what matters.
Whole-room sizes that work 📐
There is no single minimum, because it depends on what the room contains and how the person moves. These are realistic working figures rather than regulations.
| Room type | Rough size | What fits | Realistic for |
|---|---|---|---|
| Compact cloakroom | Around 5 × 7 ft | Toilet, small sink | Front transfers; reversing in and out |
| Workable bathroom | Around 7 × 8 ft | Toilet, sink, shower | Most side transfers with a considered layout |
| Comfortable | Around 8 × 10 ft | All of the above plus turning space | Independent use, no compromises |
| Assisted use | Around 9 × 10 ft or more | All of the above plus room for a helper | Two people, or hoist access |
A long narrow bathroom and a square one of identical square footage behave completely differently. Square rooms hold turning space; corridor-shaped rooms rarely do, however large they are. When comparing options, compare shapes rather than areas.
The doorway 🚪
The first thing to check, because everything else is academic if the chair cannot get through.
- 32 inches clear width minimum, measured with the door open to 90 degrees, from the door face to the opposite stop. This is always less than the nominal door size.
- Maneuvering space on the pull side so the chair can sit clear of the swing while the door opens.
- Outward-opening is better in a small bathroom — it frees floor inside, and if someone falls against the door it can still be opened from outside.
- Lever handles, not knobs. A lever works with a closed fist or a forearm.
- Threshold ½ inch maximum, bevelled above ¼ inch. Castors catch on square edges.
- Offset (swing-clear) hinges recover roughly 1½–2 inches of clear width for the price of a pair of hinges — the best value change available anywhere in an accessible bathroom.
Turning and circulation 🔄
Two standard options, and one honest alternative that most homes actually use.
- Turning circle: a clear 60-inch diameter of unobstructed floor. Simple, generous, and rare in existing homes.
- T-turn: a 60 × 60-inch T-shaped space allowing a three-point turn. Fits into more rooms because the arms of the T can run under fixtures.
- Reversing: no turning space at all — the user backs in or backs out. Extremely common, works fine for many people, and frees an enormous amount of floor.
Knee clearance under a fixture counts toward turning space. A wall-mounted sink with open space beneath is not just easier to use — it enlarges the room, because the chair’s footplates can travel under it.
If the room cannot hold both, keep the clear floor beside the toilet and give up the turning circle. Reversing in and out is a minor inconvenience. A transfer you cannot make is not.
The sink 🚰
The fixture most often left as it was, and one of the easiest wins in the room.
| Element | Target | Why |
|---|---|---|
| Rim height | Max 34 in | Reachable from seated |
| Knee clearance height | At least 27 in | The chair can pull under |
| Knee clearance depth | At least 17 in | Close enough to reach the faucet |
| Clear floor in front | Around 30 × 48 in | Room to approach |
| Faucet type | Lever or sensor | No grip or twist required |
| Pipework | Insulated or boxed | Prevents burns to legs that cannot feel heat |
The pipework point is easy to miss and genuinely important. Under a wall-mounted sink, hot supply and waste pipes sit directly against the shins of someone who has pulled underneath — and reduced sensation is common among wheelchair users. Insulation is cheap; a burn is not.
Swapping a pedestal sink for a wall-hung one is one of the highest-value changes in an accessible bathroom: it makes the sink usable, and it hands back floor area the pedestal was consuming.
Shower and bathing 🚿
- Roll-in shower, no threshold — the gold standard. A shower chair or wheeled commode rolls straight in.
- Around 60 × 30 inches minimum for a roll-in enclosure, more if a helper assists.
- Falls to the drain, not a step. A gently graded floor contains water without creating a lip.
- Handheld shower head on a slide rail, with the hose long enough to reach a seated user comfortably.
- Controls near the entry, so the water can be started and tested before moving under it.
- Grab bars, and a folding seat if a shower chair is not used.
- Thermostatic mixing valve. Scald protection matters most where sensation is reduced.
Removing a bathtub to create a level-access shower is usually the single biggest transformation available to a small bathroom. It is also the most expensive, so it belongs at the end of the list rather than the start.
The toilet, in room context 🚽
Covered in depth elsewhere, but three points matter specifically at room-planning stage, because they are expensive to change afterwards.
- Which wall it sits on determines which side the clear floor falls — and that has to match the user’s transfer side. Decide this before anything else is fixed.
- Wall-hung versus floor-mounted changes the projection into the room by a few inches, and those inches often decide whether the layout works.
- Flush control position should be on the open side. Reaching across the body to a wall-side flush is awkward from a seated position.
Flip-Up Grab Bar
The bar that gives support without permanently spending floor space.
In a room where every inch of circulation counts, a fixed bar on the open side is a permanent cost. A flip-up bar charges you that space only while it is in use — support when lowered, full clearance when raised. In tight bathrooms it is often what makes a layout work at all.
- Position
- Open / transfer side
- Raised
- Flat to the wall
- Height
- 33–36 in typical
- Mounting
- Studs or backing only
- Buys back circulation space when it is not needed
- Full support lowered for transfers
- Keeps walking routes clear for everyone else in the household
- Requires serious anchoring — all leverage lands on one plate
🔩 Fit into studs or wood backing, never plain drywall. As an Amazon Associate we may earn from qualifying purchases at no extra cost to you.
Reach ranges: switches, storage, controls 🖐️
The detail that separates a bathroom that technically works from one that is comfortable to use. Everything a seated person needs should sit between roughly 15 and 48 inches from the floor.
- Light switch inside that band, and reachable before entering rather than across the room.
- Towel rails lowered. A rail at standing height is decorative from a chair.
- Storage in the band too. High cabinets are storage for somebody else.
- Mirror lowered, or tilted. A standard mirror shows a seated user the ceiling.
- Paper dispenser 7–9 inches in front of the toilet, and never mounted where it blocks a grab bar.
- Emergency call point reachable from the floor, not just from the chair — that is the situation it exists for.
Planning for a hoist 🏗️
Even where a hoist is not needed today, leaving room for one costs nothing at planning stage and is close to impossible to add afterwards. It is the single most valuable piece of future-proofing in an accessible bathroom.
- Floor clearance under the toilet. A mobile hoist’s legs have to pass beneath the pan to bring the sling over it. Deep skirted pedestals block this completely; wall-hung pans are ideal.
- Clear floor for the base to swing. A mobile hoist needs considerably more room than a wheelchair, and the space has to be free at floor level rather than just at seat level.
- Ceiling structure for a track hoist. Whether the ceiling can carry a track is decided when the ceiling is built. Ask the question during a remodel, even if you never install one.
- A route from the door to the toilet wide enough for a hoist with someone walking beside it.
- Nothing fixed in the swing path — towel rails and radiators are the usual offenders.
Adding structure for a ceiling track later means taking the ceiling down again. During a remodel it is a conversation with the builder that may cost nothing at all, and it keeps an option open that would otherwise close permanently.
What to give up first ⚖️
Almost no existing bathroom meets every figure. The useful skill is knowing the order in which to concede.
| Priority | Element | If you cannot achieve it |
|---|---|---|
| 1 — never give up | Door clear width | Nothing else matters; fix this first |
| 2 — never give up | Clear floor on the transfer side | No equipment substitutes for it |
| 3 — protect hard | Toilet height matched to the cushion | Riser or replacement toilet |
| 4 — protect | Sink knee clearance | Wall-mounted sink, or wash elsewhere |
| 5 — negotiable | Roll-in shower | Transfer bench or shower chair instead |
| 6 — negotiable | Turning circle | Reverse in or out |
| 7 — first to go | Two-person circulation | Only matters if a helper assists |
The pattern is that space you cannot substitute ranks above space you can work around. A doorway and a transfer zone have no alternatives. Turning space has an alternative called reversing, and most people use it without thinking about it.
Common mistakes (with fixes) 🔍
A beautifully specified accessible toilet behind a doorway the chair cannot pass through.
The fix: measure the clear door width first, and fix it first. Offset hinges are cheap and often sufficient.
It cannot be used from a chair, and it occupies floor the room badly needs.
The fix: a wall-mounted sink makes the fixture usable and enlarges the effective room at the same time.
People spend heavily to achieve 60 inches of turning space and squeeze the transfer zone doing it.
The fix: transfer space first. Reversing in and out is a perfectly ordinary way to use a bathroom.
Hot pipes sit against the shins of someone who may not feel heat until the skin is damaged.
The fix: insulate or box in every pipe under the sink. Inexpensive, and it prevents a serious injury.
Mirror, towel rail, switch, storage — all specified by someone standing up, all unusable from seated.
The fix: sit in the room and check every reach. The 15–48 inch band is the working zone.
The clear floor ends up on the side the user does not transfer from. Everything measures correctly and nothing works.
The fix: establish the transfer side before the layout is decided. It is the first design input, not a detail.
A final note on measuring: take every dimension twice, on different days. Bathrooms are awkward spaces to measure in, tapes slip on wet tile, and it is remarkably easy to record a figure from the wrong reference point. A repeated measurement that disagrees with the first is telling you something useful before anybody orders anything.
Pro tips 💡
- Tape the whole room out — fixtures, clearances, door swing — before signing off a plan. A roll of tape has prevented a lot of expensive mistakes.
- Add plywood backing while the walls are open. It costs almost nothing during a strip-out and lets grab bars go anywhere, at any height, later.
- Specify the thermostatic valve at first fix. Adding scald protection afterwards means opening the wall again.
- Sit in the chair in the finished room before the contractors leave. Reaches, switch positions and mirror height are trivial to change on day one.
- Choose a slip-resistant floor with texture, not just a rating. Wet accessible bathrooms see more standing water than ordinary ones.
- Plan for a helper even if none is needed now. Adding circulation later is structural; leaving it now is free.
- Get the OT report before you commission drawings. It is the document that unlocks funding and it shapes the layout.
What this looks like in real life 🏡
“The sink gained us the room”
A bathroom judged too small for a wheelchair. Replacing the pedestal sink with a wall-hung one did two things at once: the chair could pull underneath to wash, and the footplates could travel into that space during turns. The room did not change size. It changed shape, and that was enough.
“We built a turning circle we never used”
A remodel that prioritized the 60-inch turning space, achieved by moving the toilet tight into a corner. He had always reversed in anyway. What he lost was the clear floor for his transfer — the one thing that could not be worked around. The standard he chased was not the standard he needed.
“Nobody insulated the pipes”
A well-designed accessible bathroom, wall-mounted sink, generous clearances — and bare copper hot pipe underneath. He had no sensation below the knee and did not notice the contact. Pipe insulation costs very little and should be treated as part of the specification, not an optional extra.
Frequently asked questions ❓
What size does a wheelchair accessible bathroom need to be?
There is no single minimum. A compact room of around 5 by 7 feet can work for a front transfer with the chair reversing in and out; around 7 by 8 feet is comfortable for most side transfers with a considered layout. Shape matters more than area — square rooms hold turning space, corridor-shaped rooms rarely do.
How wide does the bathroom door need to be?
At least 32 inches of clear width, measured with the door open to 90 degrees from the door face to the opposite stop. That is always less than the nominal door size. Offset or swing-clear hinges recover roughly 1.5 to 2 inches for the price of a pair of hinges, which is the cheapest useful change in the whole room.
Do I need a 60-inch turning circle?
Not at home. Plenty of accessible bathrooms work with the user reversing in or out, and a T-turn fits into more rooms than a full circle because its arms can run under fixtures. If turning space competes with clear floor beside the toilet, keep the transfer space — that is the one with no alternative.
What height should the sink be?
Rim no higher than 34 inches, with at least 27 inches of knee clearance height and 17 inches of depth underneath so the chair can pull in. Use lever or sensor faucets, and insulate or box in the pipework — exposed hot pipes sit directly against the legs of someone who may have reduced sensation.
Is a roll-in shower essential?
It is the best solution but not the only one. A transfer bench or a shower chair over a low-threshold tray works for many people at a fraction of the cost and disruption. Removing a bathtub for a level-access shower transforms a small bathroom, which is why it belongs at the end of the priority list rather than the start.
My bathroom is much smaller than these numbers. Is it hopeless?
Usually not. Clear the room, measure properly, and check the two things that cannot be substituted: door clear width and clear floor on the transfer side. Everything else has a workaround. An occupational therapist can tell you which shortfalls are genuine barriers and which are simply differences from a public specification.
Room sizing checklist ✅
Before you draw or commission anything
- Door clear width measured with the door open 90°
- Transfer side established and recorded
- Clear floor on that side measured
- Chair width and length measured, person seated
- Sink rim height and knee clearance checked
- Pipework under the sink insulated or boxed
- Shower entry threshold checked
- Thermostatic mixing valve specified
- Every control and fitting within 15–48 in
- Mirror and towel rail lowered to seated height
- Turning method decided — circle, T-turn or reversing
- Wall backing added if the walls are open
- Helper circulation considered
- OT report obtained before commissioning work
The bottom line
Size the room from the outside in: doorway first, then the transfer zone, then the fixtures, then the reaches. Two of those — the door and the clear floor beside the toilet — have no substitute, so they get protected whatever else has to go.
Everything else has a workaround. Turning space becomes reversing; a roll-in shower becomes a transfer bench; a pedestal sink becomes a wall-hung one that gives back floor as well as function. Most bathrooms that look too small on paper are workable once the concessions are made in the right order.
Keep reading: Wheelchair Accessible Toilets: The Complete Guide · Wheelchair Accessible Toilet Dimensions · Toilet Transfer Space · Accessible Bathroom Remodel Priorities · Small Accessible Bathroom Ideas · What Makes a Toilet ADA Compliant · ADA Bathroom Requirements Checklist · ADA Bathroom Layouts · ADA Sink, Vanity and Mirror Height
Figures referenced draw on the ADA Standards for Accessible Design, which apply to public accommodations rather than private homes. Use them as a target, and have an occupational therapist advise on your specific room.