How to Install a Grab Bar That Will Actually Hold
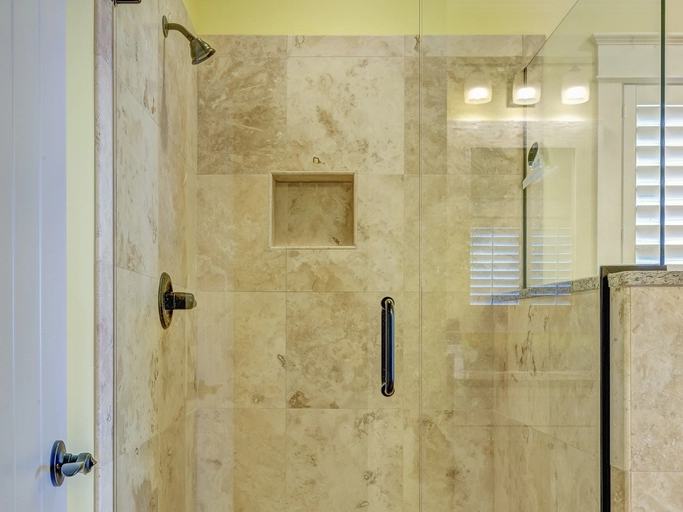
A grab bar is a simple thing to fit and an easy thing to fit badly. The bar itself is rarely the failure — the wall is.
And a bar that pulls out of the wall is worse than no bar, because it fails at the exact moment someone has committed their weight to it. They are not falling and then reaching; they are falling because the thing they reached for gave way.
⚡ The short version
Fix into structure. Studs, wood blocking, or solid masonry. Nothing else.
Drywall anchors are not enough for a fall load, whatever the packet says.
Test it hard before anyone relies on it — with more force than a person would apply.
What a bar actually has to resist 🏋️
The accessibility standard is 250 pounds of force, applied at any point, in any direction. That second half is what people miss.
- Downward load when someone pushes to stand — the easy one.
- Outward pull when someone hauls themselves up, which tries to rip the plate off the wall. This is the direction that fails.
- Shock loading when someone falls onto it. A falling body generates far more than its own weight.
- Leverage. Force at the middle of a bar multiplies at the end plates.
- Repeated cycles. Thousands of loads over years work fasteners loose.
Design for the fall, not the push. A bar that handles someone standing up may still fail when someone drops onto it — and the second case is the one it exists for.
Know your wall 🧱
| Wall type | How to tell | Mounting approach |
|---|---|---|
| Wood studs + drywall | Sounds hollow; studs every 16 or 24 in | Long screws into the stud centers |
| Studs with tile over | Hollow, hard surface | As above, drilling carefully through tile |
| Solid brick or block | Sounds dead; heavy drilling dust | Proper masonry anchors |
| Metal studs | Hollow; magnet finds thin steel | Specialist fasteners or added blocking |
| Drywall, no stud where needed | Hollow, nothing behind | Add blocking, or use a mounting plate |
| Dot-and-dab board on masonry | Hollow, then solid deeper | Long anchors reaching the masonry |
The last row catches people out badly. A board fixed to masonry with adhesive dabs feels hollow when tapped, so people use drywall anchors — which grip a sheet with a void behind it. The anchoring has to reach through to the masonry.
Finding the structure 🔍
- Use an electronic stud detector that also flags live cables and pipes. In a bathroom this second function matters as much as the first.
- Confirm by tapping. Hollow between studs, duller over one.
- Find both edges of the stud and mark the center. Fixing near an edge splits the wood.
- Check the spacing. Once you find one stud, others usually sit at regular intervals — that confirms the reading.
- Drill a small pilot hole in an inconspicuous spot to verify before committing.
- Assume there are pipes and cables near a toilet, a sink and a shower, because there are.
Water supply and waste pipes, and the cabling for lights, extractors and shaver sockets, all run inside these walls — frequently directly above or beside the fixtures you want to fit a bar next to.
Use a detector that finds live cables and metal, not just studs, and if you are at all unsure, stop and get a professional in.
Marking the position 📐
Position matters more than any other decision, and it is the one most often made by whoever is holding the drill rather than by the person who will use the bar.
- Have the person sit or stand where they normally do and reach for where they want the bar. Mark that.
- Tape it out and live with it for a few days before drilling. Positions that seem obvious frequently are not.
- 33 to 36 inches from the floor to the top of the bar is the standard, and it is a starting point rather than an answer.
- Check the reach from seated, not standing — that is where the movement begins.
- Keep the fasteners clear of the toilet tank, the paper holder and any pipework.
- Be prepared to move the position to land on a stud, but only slightly. If the compromise is more than an inch or two, add blocking instead.
Fitting into studs 🔩
- Mark the stud centers and hold the bar against them, checking the level.
- Mark through the mounting holes that land on structure. Every plate should hit a stud.
- Drill pilot holes sized for your screws — undersized in wood, so the thread bites.
- Use long screws. They must pass through the drywall and at least 1½ inches into solid wood.
- Add silicone behind the plates before mounting. It seals the holes against water getting into the wall.
- Tighten firmly but not brutally. Stripping the wood leaves a fastener that looks tight and is not.
- Fit any cover plates and wipe off excess silicone.
42-Inch ADA Grab Bar
Full length, 1.5-inch standoff, rated for 250 lbf — the specification worth fitting properly.
A longer bar gives usable hand positions across the whole movement rather than one fixed grip, and it spans more than one stud — which is an advantage, not a problem, because it means both plates can land on structure. Look for a knurled or textured finish that holds grip when wet.
- Length
- 42 in
- Diameter
- 1.25–1.5 in
- Clearance
- 1.5 in from the wall
- Rated
- 250 lbf, any direction
- Hand positions across the whole movement, not a single grip
- Spans two studs, so both plates can hit structure
- 1.5-inch standoff so fingers cannot jam or an arm trap
- Textured finish holds grip on wet hands
🔩 Fit into studs, blocking or solid masonry — never drywall alone. As an Amazon Associate we may earn from qualifying purchases at no extra cost to you.
Drilling through tile 🧱
- Mark with tape over the spot — it stops the bit skating and marks the tile.
- Use a tile or diamond bit for the glazed layer, then swap to a normal bit for what is behind.
- Start slow, no hammer action. Hammer mode will crack the tile.
- Keep it cool with a little water; heat is what cracks tiles and kills bits.
- Drill through the tile face, not a grout line where you have the choice — grout is weaker and more prone to letting water in.
- Seal every hole with silicone. Water behind tile causes damage you will not see until it is expensive.
When there is no stud where you need one 🧩
Common, and the point at which most bad installations happen — because the tempting answer is a drywall anchor.
| Option | How it works | Verdict |
|---|---|---|
| Add wood blocking | Open the wall, fit noggins between studs, make good | Best — bar goes anywhere afterwards |
| Mounting plate spanning studs | A plate screwed to two studs; bar fixed to the plate | Very good, no wall opening |
| Move the bar to reach a stud | Shift the position slightly | Fine for an inch or two, not more |
| Heavy-duty toggle fasteners | Spread load behind the board | Last resort; check the rating carefully |
| Standard drywall anchors | Grip the board only | No. Not for a fall load |
| Freestanding frame or floor-to-ceiling pole | Load goes to the floor instead | Excellent alternative; no drilling |
The last row deserves more attention than it gets. If the wall will not take a bar, a floor-standing frame or a floor-to-ceiling pole sidesteps the problem entirely — the load goes into the floor, which is always structural.
Masonry walls 🧱
- Use anchors rated for the material — brick, dense block and aerated block all behave differently and aerated block is much weaker.
- Drill the exact diameter the anchor specifies. Oversized holes are the usual cause of failure.
- Clear the dust out before inserting anchors; dust dramatically reduces grip.
- Fix into the brick, not the mortar, wherever you can choose.
- Resin anchors for aerated block, which crumbles under expansion anchors.
- Let resin cure fully before any load — check the packet, and do not rush it.
Flip-up bars need more 🔧
A flip-up bar is the best product for a tight bathroom and the most demanding thing on this page to install, because of simple geometry: a fixed bar spreads its load across two plates, and a flip-up bar puts everything through one.
- Leverage multiplies the load. Someone pushing down at the far end of a folding arm applies several times that force at the mounting plate.
- The load direction changes as it moves — downward when lowered, and a twisting pull as it is raised or dropped.
- One plate, so every fastener counts. On a fixed bar, a marginal screw is backed up by the plate at the other end. Here there is no other end.
- Blocking rather than a single stud is strongly preferable — a plate spanning solid wood across its whole footprint, not two screws into one joist.
- Follow the manufacturer’s mounting spec exactly. This is not the place to substitute the screws you have in the drawer.
- Test the raising and lowering under load, not just the static bar — that is when the twisting force appears.
If you fit only one bar yourself and pay someone for another, make the flip-up the paid one. The consequence of a fixed bar working slightly loose is a wobble you notice. The consequence of a flip-up plate failing is the whole arm coming away while someone’s weight is on it.
Testing it properly 💪
Do not skip this, and do not do it gently. You are trying to make it fail now, in controlled conditions, rather than later under someone’s full weight.
- Pull outward, hard. This is the direction that fails, so test it first and test it seriously.
- Push down with your full weight at the center.
- Push down at each end, where leverage on the plates is highest.
- Hang from it briefly if you can do so safely. It should not move at all.
- Have the heaviest available person test it, not the lightest. Your test proves less than you think if the user is heavier than you.
- Look for movement, gaps, or creaking. Any of the three means stop and reassess.
- Check the drywall around the plates for hairline cracking, which means the load is going into the board rather than the wood.
A correctly fitted bar has no perceptible movement in any direction, under any force you can apply standing on the floor. If you can feel anything — a tiny flex, a creak, a hint of give — it is not finished.
Checking it over time 📅
- Retest every six months, the same way you tested it on day one.
- Check after the first two weeks — new fasteners bed in and frequently need one early tighten.
- Watch the sealant around the plates. A failed seal lets water into the wall, and wet wood loses grip.
- Look for staining or soft drywall near the fasteners, which signals water ingress.
- Retighten rather than ignore the first sign of movement.
- If a fastener keeps loosening, it has failed. Move it to sound structure or add blocking — repeated tightening in a stripped hole is not a repair.
When to call a professional 👷
- You cannot confidently identify the wall type.
- There is no stud where the bar needs to go, and blocking means opening the wall.
- The wall is metal stud, which needs specific fasteners and experience.
- Pipes or cables are anywhere near the intended position.
- It is a rented property and the landlord wants professional installation — a reasonable condition and usually the one that gets you a yes.
- The user is heavy, or the bar is load-critical, such as a flip-up bar where all the leverage lands on one plate.
- You are not certain. That is a good enough reason on its own.
Common mistakes (with fixes) 🔍
They hold a picture and they will not hold a falling adult, whatever figure is printed on the packet.
The fix: studs, blocking or masonry. If none is available, use a floor-standing frame instead.
The bar ends up where it was easy to fit rather than where the hand goes, so people still reach for the towel rail.
The fix: mark the position from the person’s actual reach. Move it an inch or two to catch a stud; add blocking for anything more.
A light pull proves nothing. The bar exists for a moment of sudden, full body weight.
The fix: pull outward hard, load each end, and have the heaviest available person test it.
Pipes and cables run through exactly the walls you want to fit bars to, especially near a toilet or sink.
The fix: use a detector that finds live cables and metal, and stop if you are unsure.
Water gets behind the tile, the wood softens, and a fastener that was solid slowly is not.
The fix: silicone behind every plate before mounting, and check the seal at every retest.
Fasteners loosen through thousands of load cycles, and nobody notices until the day it matters.
The fix: retest at two weeks and every six months, the same way you tested it new.
Pro tips 💡
- Buy a detector that finds cables, not just studs. In a bathroom that is the more important function.
- Tape the position and live with it for a few days before drilling. Free, and it prevents the most common error.
- Buy the longer bar. It spans two studs, which makes sound anchoring easier rather than harder.
- Photograph the wall before you close or tile it, if any work is happening. You will want to know where the blocking is.
- Add blocking to every wall while one is open, not just where you currently want a bar.
- Keep spare screws with the paperwork. Retightening in five years is easier with the right ones.
- If the wall genuinely will not take it, stop fighting it. A floor-standing frame or pole is a good answer, not a compromise.
Frequently asked questions ❓
Can I fit a grab bar into drywall?
Not into drywall alone. A bar has to resist 250 pounds of force in any direction, including an outward pull that tries to tear the plate off the wall, and drywall anchors cannot do that reliably. Fix into wood studs, added blocking, or solid masonry — or use a floor-standing frame instead.
What if there is no stud where I need the bar?
Best answer is wood blocking fitted between the studs, which means opening the wall but lets the bar go anywhere afterwards. A mounting plate spanning two studs is nearly as good without opening anything. Moving the bar an inch or two to catch a stud is fine; moving it further defeats the purpose.
How high should a grab bar be?
The standard is 33 to 36 inches from the floor to the top of the bar, and that is a starting point rather than an answer. Have the person sit or stand where they normally do, reach for where they want it, and mark that. Tape the position and live with it for a few days before drilling.
How do I drill through bathroom tile?
Put tape over the spot to stop the bit skating, use a tile or diamond bit for the glazed layer, start slowly with no hammer action, and keep it cool with a little water. Drill through the tile face rather than a grout line where you can, and seal every hole with silicone afterwards.
How do I know the bar is safe?
Test it harder than a person would use it. Pull outward hard — that is the direction that fails — then push down at the center and at each end where leverage is highest. Have the heaviest available person test it. A correctly fitted bar has no perceptible movement in any direction.
Should I get a professional to fit it?
Yes if you cannot identify the wall type, if there is no stud where the bar needs to go, if the wall is metal stud, if pipes or cables are anywhere near, or if you are simply not certain. Being unsure is a good enough reason — the consequence of getting this wrong is a bar that fails at the worst possible moment.
Installation checklist ✅
Before, during and after
- Position marked from the user’s actual reach, seated
- Position taped and lived with for a few days
- Wall type identified
- Detector used for studs, live cables and pipes
- Stud centers found and marked
- Every mounting plate lands on structure
- Screws long enough for 1.5 in into solid wood
- Correct bit used for tile; no hammer action
- Silicone behind every plate
- All holes sealed
- Tested with an outward pull, hard
- Tested at each end, and by the heaviest available person
- No movement, gaps or creaking
- Retest scheduled at two weeks and every six months
- Spare screws kept with the paperwork
The bottom line
The bar is not the hard part. Finding real structure to fix it to is, and everything else follows from that: studs, blocking or masonry, never drywall anchors, and a detector that finds cables as well as wood.
Mark the position from the person’s own reach rather than from where the studs happen to be — add blocking if the two disagree. Seal every hole. Then test it hard enough to make it fail now, in front of you, rather than later under somebody’s full weight. And if the wall genuinely will not take a bar, a floor-standing frame is a proper answer rather than a compromise.
Keep reading: Where Should Toilet Grab Bars Be Installed? · Best Grab Bars for the Toilet · Grab Bars for Renters · Toilet Safety Rails vs Grab Bars · Aging in Place: Planning a Bathroom · Grab Bars for the Elderly · ADA Grab Bar Height · Grab Bar Height by Location · Are Suction Grab Bars Safe? · Does Medicare Cover Grab Bars? · Grab Bar Installation Cost · Types of Bathroom Grab Bars · Grab Bar Sizes: Lengths and Diameters
General information, not a substitute for professional installation. If you are unsure about wall construction, hidden services or mounting method, have a qualified contractor fit the bar — a grab bar that fails is more dangerous than no grab bar at all.