Handicap Bathrooms: What the Term Means and What Actually Matters
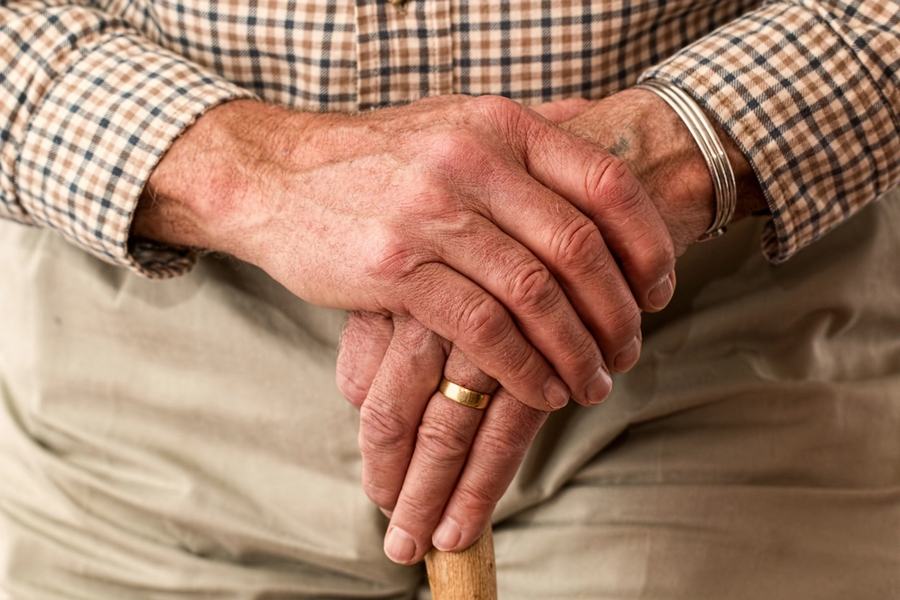
Three words get used interchangeably and mean quite different things. “Handicap” is a description, “accessible” is a goal, and “ADA compliant” is a legal test — and a bathroom can be any one of them without being the others.
This is the plain-language version: what people actually mean when they say handicap bathroom, which features earn their place, what it costs, and where to go for the technical numbers when you need them.
⚡ The short version
At home, nothing is required. No standard applies, no inspection happens — fit the person.
Four features do most of the work: grab bars, a seat, a level entry, and lever controls.
Cost ranges hugely — $300 of fittings to $25,000 of building work, and the cheap end removes more risk per dollar.
Start by watching, not by shopping.
Handicap, accessible, ADA — three claims 🏷️
| Term | What it actually means | Who decides |
|---|---|---|
| Handicap bathroom | Informal — a bathroom adapted for someone with limited mobility | Nobody; it is a description |
| Accessible bathroom | A bathroom a particular person can actually use | The person using it |
| ADA compliant | Meets every dimension in the 2010 Standards | An inspector, against a published list |
| Wheelchair accessible | Usable from a wheelchair — turning space, transfer space | Practical test |
| Universal design | Works well for everyone, not adapted for anyone | Design philosophy |
| Visitable | A guest with mobility needs can get in and use the toilet | Some local ordinances |
A bathroom can be fully ADA compliant and useless to the person who lives there, or completely non-compliant and perfect for them. Compliance answers a legal question; accessibility answers a human one.
The word “handicap” itself is worth a note. It is still widely used in product listings and searches, which is why it appears here — but many disabled people prefer “accessible”. Neither term changes what the room has to do.
The features that matter 🔧
| Feature | Why it earns its place | Typical cost |
|---|---|---|
| Grab bars at toilet and bathing entry | The two most repeated risky movements | $200–$400 fitted |
| A seat in the shower | Removes the long unsupported stand | $80–$600 |
| Level or near-level entry | Removes the single-footed step on a wet floor | $0 (chair) to $12,000 (conversion) |
| Lever taps and handles | Workable with a forearm, arthritic hands, full hands | $80–$400 |
| Good lighting and a night light | Seeing the hazard beats being caught by a bar | $20–$300 |
| Non-slip flooring | Matte, small-format, rated for wet barefoot use | $30–$1,500 |
| Handheld shower | Lets someone wash seated and a helper assist | $40–$450 |
| Toilet at a workable height | 17–19 in suits most adults | $25–$1,000 |
| Anti-scald valve | Older skin burns faster and reacts slower | $350–$900 |
| Wider doorway | 32 in clear for a walker or chair | $500–$2,500 |
| Turning space | Only matters if a wheelchair is involved | Layout, not a purchase |
Read the cost column against the “why” column and the pattern is stark. The first four rows cover most of the real risk, and only one of them is expensive. A great many households spend the budget on row three and never fit rows one, two or four.
What to do first 🔢
Before buying anything, spend a day watching. Where do they hesitate? What do they hold onto? Which movement takes longest? That answers more than any feature list.
- Grab bars where their hand already goes. Watch what they grab — the towel rail, the sink, the shower screen — and fit a real bar there.
- Better light, and a night light on the route from the bed. Cheap, and night trips are when a lot of falls happen.
- Non-slip surface in the shower or tub base, and remove loose rugs.
- A seat if standing for a full shower is hard.
- Lever handles on taps and doors.
- Sort the toilet height — test with a raised seat before replacing anything.
- Then consider the entry — a transfer bench first, a conversion only if the bench does not solve it.
- Layout changes last, and only if the room genuinely cannot work.
Everything they currently hold onto is a grab bar position without a grab bar in it. That single observation usually reorders the whole plan — and it costs nothing.
Three levels of bathroom 📊
| Adapted | Accessible | Fully wheelchair accessible | |
|---|---|---|---|
| For | Walks, needs support | Walker or limited mobility | Wheelchair user |
| Grab bars | Yes | Yes | Yes, positioned for transfers |
| Shower | Seat added | Low threshold + seat | Roll-in, level |
| Toilet height | Raised seat | 17–19 in | 17–19 in, 16–18 in centerline |
| Doorway | Existing | Ideally 32 in clear | 32 in clear, essential |
| Turning space | Not needed | Helpful | 60 in, essential |
| Sink | Existing | Lever tap | Roll-under, 34 in max |
| Typical cost | $300–$1,500 | $3,000–$12,000 | $15,000–$40,000 |
Most households need the first column and think they need the third. The middle column is where a walker or a recovery period lands, and the third is genuinely only for a wheelchair — where the turning space and the roll-under sink stop being nice-to-haves and become the whole point.
Grab Bars for the Toilet and Bathing Entry
250 lbf rated, 1.25–1.5 in diameter, textured — fitted into structure.
Whatever level of bathroom you end up with, these two positions come first — beside the toilet horizontally, and at the shower or tub entry vertically. They address the two movements behind most bathroom falls, cost a fraction of any building work, and can be fitted in an afternoon. Buy both at once: most of an installer’s charge is the call-out, so the second bar costs far less than a second visit.
- Rated
- 250 lbf, any direction
- Diameter
- 1.25–1.5 in
- Height
- 33–36 in to the top
- Mounting
- Studs or blocking
- Fit where their hand already goes, not where the tiling suggests
- Buy two together — the second is nearly free once someone is on site
- Textured finish holds a wet or weak hand
- The rating assumes real anchoring — never drywall anchors alone
🔩 Ask your Area Agency on Aging first — many areas fit grab bars free for older households. As an Amazon Associate we may earn from qualifying purchases at no extra cost to you.
Layout in plain terms 📐
You do not need the technical dimensions to make good layout decisions. Four principles cover most of it.
- Put the toilet in a corner. Two walls, two grab bar positions, no extra cost. This one decision makes everything afterward easier.
- Make the door open outward, or slide. It frees space inside, and it means someone who falls cannot block it from the inside.
- Leave clear floor on one side of the toilet, not both. That is the side someone stands, turns or transfers on.
- Put blocking in every wall while they are open during any work. It costs almost nothing then and lets any future bar go anywhere.
If a wheelchair is genuinely involved, the technical numbers do start to matter — turning space, centerline, clear floor rectangles. Those are worth getting right, and they are set out properly in the standards rather than guessed at.
What it costs 💵
| Job | Typical fitted cost |
|---|---|
| Grab bars, pair | $200–$400 |
| Shower seat and handheld shower | $150–$600 |
| Lever taps and door handles | $150–$500 |
| Raised toilet seat | $25–$150 |
| Comfort height toilet | $400–$1,000 |
| Non-slip flooring | $800–$2,500 |
| Tub to low-threshold shower | $3,000–$9,000 |
| Curbless / roll-in shower | $6,000–$18,000 |
| Widen a doorway | $500–$2,500 |
| Full layout change | $15,000–$40,000 |
Worth asking about funding before spending any of it. Medicare will not pay for bathroom modifications, but Medicare Advantage over-the-counter allowances, Medicaid waivers, VA HISA grants, Area Agency on Aging programs and the medical expense deduction all can — and most families never ask.
If you rent 🔑
- Ask in writing. Under the Fair Housing Act a landlord generally cannot refuse a reasonable modification made at the tenant’s expense — and grab bars are the textbook example.
- Offer to use a qualified installer and to make good at the end of the tenancy. That removes most objections.
- No-drill options exist meanwhile: a toilet safety frame, a floor-to-ceiling pole, a shower chair, a transfer bench. All send the load to the floor.
- Avoid suction bars for anything load-bearing. They release without warning and look exactly like fixed bars, which is what makes them dangerous.
- Contact a fair housing agency or HUD if a written, reasonable request is refused.
If it is for the public 🏢
Everything above is about homes, where nothing is required and nobody inspects. If the bathroom serves customers, clients or the public, the picture changes entirely.
- The ADA applies, and “handicap bathroom” stops being a description and becomes a set of measurable requirements.
- Every dimension has to be met — door clear width, turning space, toilet centerline, grab bar lengths and heights, sink clearances, dispenser positions, control operability.
- One failure makes the room non-compliant, however good everything else is.
- Products cannot make a room compliant. An “ADA compliant toilet” reliably delivers one requirement out of about a dozen; the rest belong to the room.
- The expensive failures are decided on the drawing — clear door width, drain position, door swing — so check the plan before anything is built.
Applying commercial requirements to a small home bathroom wastes space and money on things nobody there needs. Applying home logic to a public restroom fails inspection.
Establish which situation you are in first — it changes every decision that follows.
When the need is temporary 🕑
A great deal of adaptation is for a recovery rather than a permanent change — after a hip or knee replacement, during treatment, while a fracture heals. That changes what is worth doing.
- Equipment beats building work. A raised toilet seat, a shower chair, a transfer bench and a toilet safety frame cover most post-surgical needs for a few hundred dollars, and all of it comes out again afterward.
- Grab bars are the exception worth making permanent. They cost little, they help everyone in the household, and the need often turns out not to be temporary after all.
- Ask about loan closets first. Area Agencies on Aging, senior centers and local nonprofits lend exactly this equipment free, and it is heavily stocked precisely because so many people need it briefly.
- Time the request around the hospital discharge. Equipment arranged as part of a discharge plan arrives faster and is documented better than a request made three weeks later.
- Ask the surgeon about restrictions before choosing a toilet height. Hip precautions after a replacement are specific, and they override any general guidance about seat heights.
- Return what you borrowed. It is what keeps the closet stocked for the next family.
The trap here is spending on permanent work for a temporary problem — or the reverse, treating a progressive condition as a short recovery and buying twice. If the trajectory is unclear, choose equipment now and make the structural decisions once you know.
Common mistakes (with fixes) 🔍
The tub comes out first because it is the visible problem, while grab bars and lighting — which remove more risk per dollar — wait until last.
The fix: do the cheap tier this weekend whatever else is planned. Falls do not wait for a remodel.
Sixty inches of turning space in a small bathroom no wheelchair will ever enter, at the cost of storage and a decent sink.
The fix: use the structural figures (250 lbf, 1.5 in clearance) and fit the heights to the actual person.
A toilet with the label delivers a seat height. Everything else is decided by the room and the fittings around it.
The fix: where compliance matters, work from the full requirement list rather than product descriptions.
A taller toilet goes in and they still reach for the towel rail, because they never needed inches — they needed something to push against.
The fix: watch them stand up before buying anything.
Families self-fund work that Medicare Advantage allowances, Medicaid waivers, VA grants or local programs would have covered part of.
The fix: one call to the Area Agency on Aging before spending anything.
A room built for someone walking unaided now, when a walker is likely within two years.
The fix: get the door width, the threshold and the wall blocking right now — all three are cheap in advance and expensive later.
Pro tips 💡
- Ask for an occupational therapy assessment. Often covered, and an OT frequently identifies a cheaper solution than the one being planned.
- Tape positions on the wall and live with them for a few days before drilling.
- Do the cheap tier before the big job, not after — planning takes months.
- Choose contrast. A dark seat on a white toilet, dark bars on a pale wall. Free, and much easier to see as vision declines.
- Warm the room. Cold makes people rush, and rushing is when falls happen.
- Get three quotes against one written list of positions, or you are comparing different jobs.
- Photograph open walls before they are closed, with a tape in shot.
What this looks like in real life 🏡
“We built a compliant bathroom she could not use”
Every dimension taken from the standards: 18-inch seat, bars at 34 inches, sixty inches of clear floor. She is 5 ft 1 in with no wheelchair. Her feet did not reach the floor, the bars sat above where her hand went, and the clear floor had cost them the storage they needed. Compliant, and wrong for the only person in it.
“Three hundred dollars did more than nine thousand”
A beautiful tub-to-shower conversion with no seat, no bar inside, and the valve on the far wall. She could not use it alone. A seat, a grab bar and a handheld shower — about $300 — made the nine thousand work. They should have been in the original spec.
“The county would have done it free”
They hired a handyman for grab bars, then found out afterward that the county ran a home safety program fitting them at no charge for households over 60. One call, made in the wrong order.
Frequently asked questions ❓
What makes a bathroom a handicap bathroom?
There is no official definition — it is an informal description of a bathroom adapted for someone with limited mobility. In practice it usually means grab bars at the toilet and bathing area, a seat in the shower, a level or low entry, lever taps, and a toilet at a workable height. In a private home nothing is required and nobody inspects it, so the useful test is simply whether the person who uses it can.
What is the difference between a handicap bathroom and an ADA compliant one?
“Handicap bathroom” is a description with no fixed meaning; “ADA compliant” is a legal test against published dimensions — door clear width, turning space, toilet centerline, grab bar lengths and heights, sink clearances and more. A bathroom can be genuinely accessible to the person living there without being compliant, and fully compliant without suiting them at all. The ADA applies to public accommodations, not private homes.
How much does a handicap bathroom cost?
It splits into tiers. Grab bars, a shower seat, lever taps and better lighting come to roughly $300 to $1,500 fitted, and address most of what actually causes falls. A tub-to-shower conversion runs $3,000 to $12,000. A full wheelchair-accessible layout change with a roll-in shower, wider doorway and roll-under sink starts around $15,000. The cheapest tier removes the most risk per dollar.
What features should a handicap bathroom have?
Four earn their place before anything else: grab bars beside the toilet and at the bathing entry, a seat in the shower, an entry with little or no step, and lever taps and door handles. After those, good lighting with a night light, non-slip flooring, a handheld shower and a toilet at 17 to 19 inches. Turning space and a roll-under sink only matter if a wheelchair is genuinely involved.
Do I have to meet ADA standards in my own home?
No. The ADA governs places of public accommodation and government facilities, not private residences — there is no obligation, no inspection and no penalty. The standards are still a useful reference: keep the structural figures such as the 250 lbf grab bar rating and the 1.5 inch wall clearance, but treat the heights as starting points and apply the space requirements only where a wheelchair is actually in the picture.
Where do I start if the budget is small?
Watch them use the bathroom for a day first — whatever they hold onto is a grab bar position that has no grab bar in it. Then fit bars at the toilet and bathing entry, improve the lighting including a night light on the route from the bed, and sort the floor surface. That comes to a few hundred dollars and addresses the majority of real risk. Before spending anything, call your Area Agency on Aging, since many areas fund this work.
Checklist ✅
Planning an adapted bathroom
- Established whether this is a home or a public facility
- Watched them use the room for a full day
- Noted everything they currently hold onto
- Occupational therapy assessment requested
- Area Agency on Aging and funding routes contacted
- Grab bars fitted at toilet and bathing entry
- Lighting improved; night light on the route from the bed
- Loose rugs removed; floor surface addressed
- Shower seat considered
- Lever taps and door handles
- Toilet height tested with a raised seat before replacing
- Transfer bench tried before any tub conversion
- Toilet placed in a corner if the layout is being changed
- Door opens outward or slides
- Blocking in every wall while open
- Five-year needs considered, not just today’s
- Written request to the landlord, if renting
The bottom line
“Handicap bathroom” describes an intention rather than a specification. What matters is whether the person who uses it can — and that is answered by watching them, not by a product label or a dimension table.
Four things do most of the work: grab bars where their hand already goes, a seat in the shower, an entry without a step, and controls that work with a forearm. Three of those four cost a few hundred dollars. Do them first, ask about funding before you spend, and save the building work for the problems the cheap fixes genuinely do not solve.
Keep reading: Accessible Bathrooms: The Complete Guide · ADA Bathroom Requirements Checklist · Bathroom Remodel for the Elderly · How to Make a Bathroom Accessible Without Renovating · Does the ADA Apply to Private Homes? · Grab Bars for the Elderly
Costs are indicative US ranges and vary by region and property. General information, not medical, legal or construction advice.